|
Hover to see what happens next. |
|
See it in live action.
|
|
Project description
Drum Hero has one main FSM, the Controller, that keeps track of the state of Drum Hero, and posts the appropriate events to the auxiliary FSMs and Services. When Drum Hero is turned on it begins in welcoming mode. During welcoming mode the drum and timer LED strips flash turquoise and purple. When the user puts their hand over the IR sensor the LED strips turn pink and fade from a low brightness to a high brightness. After covering the IR sensor for about 1 second the game begins. During the main gameplay loop a song begins to play and the drums will light up pink in a predetermined order. If the user hits the current active drum before the next drum lights up according to the hit intensity, the timer LED strip lights up gold, and the drums will vibrate. For every four correct drum hits the servo moves 1/10th of its maximum position, which gives a maximum score of forty points. Drum Hero enters zen mode after 49 seconds of gameplay, during which a modified version of the song plays. Drum Hero transitions back to welcoming mode once the zen mode song is over. If the user does not hit a drum for 15 seconds the system will go back into welcoming mode. The capacitive touch sensor on the front side piece is used to toggle the drum vibrations on and off.
Electrical design

|
Conditioning the piezo signal
To make the piezos sensitive yet constrained to the 0-3.3V range required by the PIC32 analog pins, a large resistor was added in parallel to the piezo terminals, and the piezo anode was routed into a unity gain buffer.
To make the piezos sensitive yet constrained to the 0-3.3V range required by the PIC32 analog pins, a large resistor was added in parallel to the piezo terminals, and the piezo anode was routed into a unity gain buffer.
|
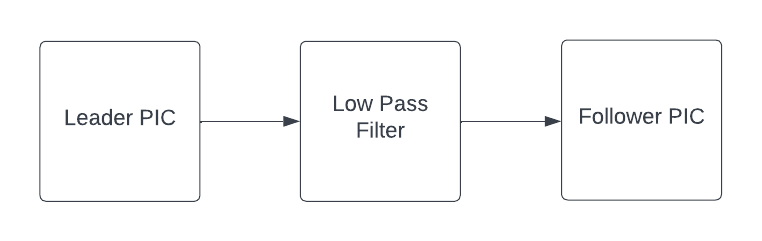
Communicating to a secondary microcontroller
Filtering high frequency PWM waves sent from the leader PIC for 100ms to the follower PIC through a low pass RC filter to communicate between PICs in order to increase the functionality of hardware. Signal conditioning and bucketing used on the follower PIC to produce varied sounds/music from Audio FX board. |
|
Stabilizing a noisy ground
After integrating all of Drum Hero's inputs and outputs, the LEDs would flash in random colors and the audio system would trigger inconsistently. After probing the circuit at multiple points, it was found that all the peripheral devices (servo, LEDs, piezos, motors) were making ground noisy. To help stabilize ground and make the circuit much more consistent, capacitors were placed across the power and ground rails of all breadboards. This significantly reduced the noise in the circuit.
After integrating all of Drum Hero's inputs and outputs, the LEDs would flash in random colors and the audio system would trigger inconsistently. After probing the circuit at multiple points, it was found that all the peripheral devices (servo, LEDs, piezos, motors) were making ground noisy. To help stabilize ground and make the circuit much more consistent, capacitors were placed across the power and ground rails of all breadboards. This significantly reduced the noise in the circuit.
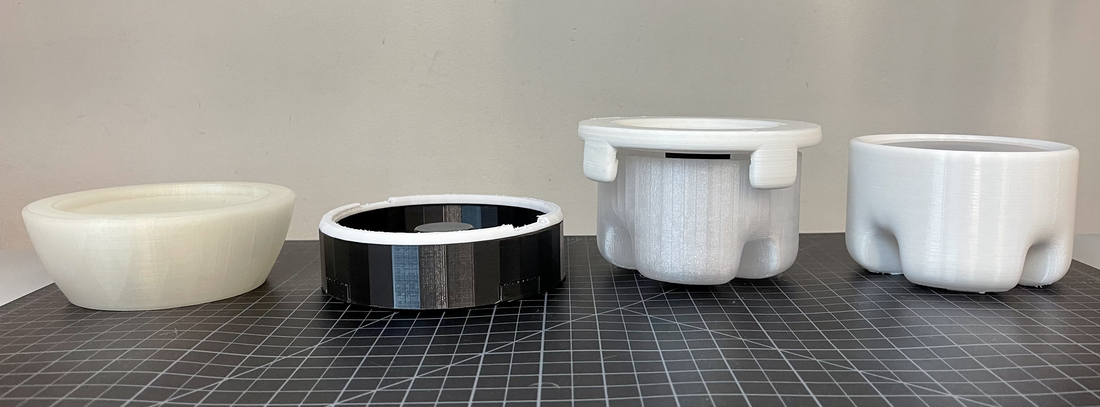
Mechanical design
|
Simplifying the interface
Iterations in design to accommodate various electrical hardware associated with the drums while keeping the design minimalistic and clean. Placement of piezo sensors, LED strips and wire management governed each iteration process. |
|
Software design
Creating an abstraction for the LED strips
Because this project makes use of LED strips rather than individual LEDs, a hardware abstraction layer (HAL) was made to simplify interactions with the LED strips in the events and services framework. The LED strip HAL has three main components: buffers that serve as internal representations of the LED strips, functions to modify state of the buffers, and a function that writes the content of the buffers to the actual strip. These strips make use of the Serial Peripheral Interface (SPI) communication system, so the SPI HAL from lab 2 was used in the LED strip HAL.
Drum Hero has four LED strips that need to be individually controlled: left drum, bottom drum, right drum, and timer. Thus, each strip gets its own buffer so that it can be modified without altering the state of the other strips. When calling a LED strip HAL function, the user must specify which strip they are modifying so the code knows which buffer to write to.
See all the state diagrams, code, and pseudocode here
Gems of Wisdom
|
Adafruit's AudioFX board plays an audio track with perceptible (over 30ms) delay, so do not depend on it to play notes in rapid succession.
|
Prints can fail in succession, so schedule a few days of buffer for printed parts.
|
When using module level indexes to represent state, only increment at the very start or very end of a cycle.
|
|
When cleaning up wiring, make sure to only rewire and test one component at a time. If you make too many changes and run into a bug it will be hard to debug.
|
Whenever you purchase a part, try to get a few extra. This way you are protected when parts fail, can test components in parallel, and make changes to your electrical design on the fly.
|
Keep KiCad updated with the most recent changes. This way members working on different parts of the project can easily recreate your circuit if they make changes to it.
|
Use stranded wire when connecting peripheral devices to the breadboard (long distance) and solid core wire when doing breadboard to breadboard connections (short distance). Solid core wire can break if it's bent too much, which can create a lot of noise and unpredictable behaviors in your circuit. Stranded wire is meant to be bent, which is why it is ideal for long distance connections.
